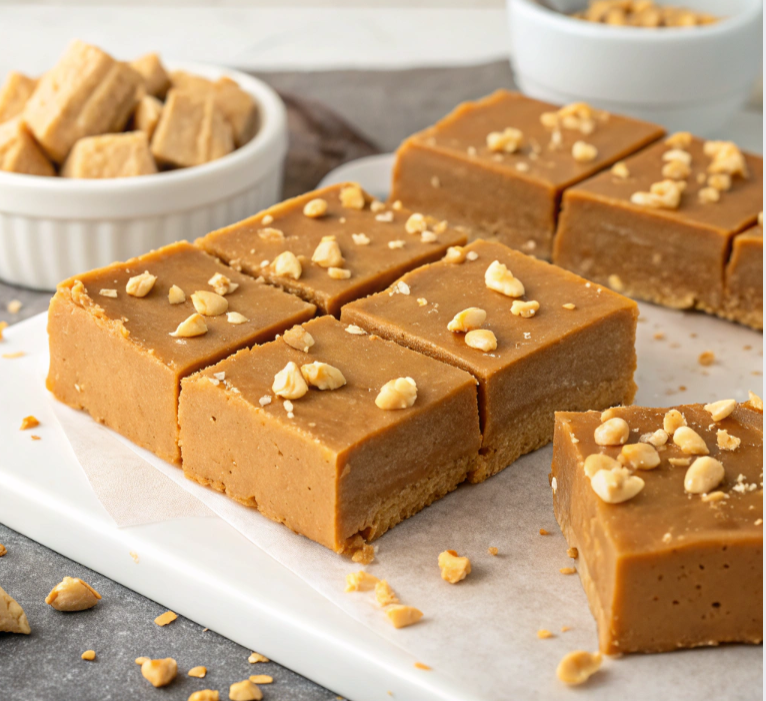
Peanut Butter Fudge is creamy and nostalgic dessert that has delighted taste buds for generations. Its rich texture and balanced sweetness make it a standout treat. Perfect for holidays, special occasions, or a simple indulgence, this dessert is beloved for its simplicity and versatility. With just a few ingredients and minimal effort, anyone can create a batch of this irresistible confection.
The charm of this fudge lies not only in its taste but also in its ability to evoke nostalgia. Many associate it with cherished memories of family gatherings or festive celebrations. Whether you’re new to making fudge or a seasoned dessert enthusiast, understanding the basics of this sweet treat is the first step to mastering it.
The Origins of Fudge Making
The history of this creamy treat is deeply rooted in the American tradition of fudge-making, which dates back to the late 19th century. Fudge itself originated as a happy accident when a batch of caramel didn’t set correctly. This serendipitous mistake led to the creation of a new dessert category that quickly gained popularity.
As peanut butter became a common household ingredient in the United States, it was only a matter of time before it found its way into fudge recipes. The combination of nutty richness with creamy sweetness proved to be a winning formula. Over the decades, Peanut Butter Fudge evolved into a staple treat, especially during the holiday season.
Today, it is celebrated for its simplicity and universal appeal. Its rich history adds to its charm, making it more than just a dessert but a piece of culinary heritage.
Why Peanut Butter Fudge is a Favorite Treat
Peanut Butter Fudge holds a special place in the hearts of dessert lovers for several reasons. First, its creamy texture and balanced flavor profile make it universally appealing. The combination of sweet and salty notes creates a harmony that satisfies diverse taste preferences.
Another reason for its popularity is its ease of preparation. With just a handful of ingredients and straightforward steps, even beginner bakers can achieve excellent results. The short preparation time makes it an ideal choice for those looking for a quick yet impressive dessert.
Additionally, this treat is highly versatile. It can be adapted to include various add-ins like chocolate, nuts, or even marshmallows, catering to different tastes. Its ability to evoke nostalgia also contributes to its status as a favorite treat. For many, it’s a dessert that recalls warm memories of family and celebrations.
Essential Ingredients for Peanut Butter Fudge
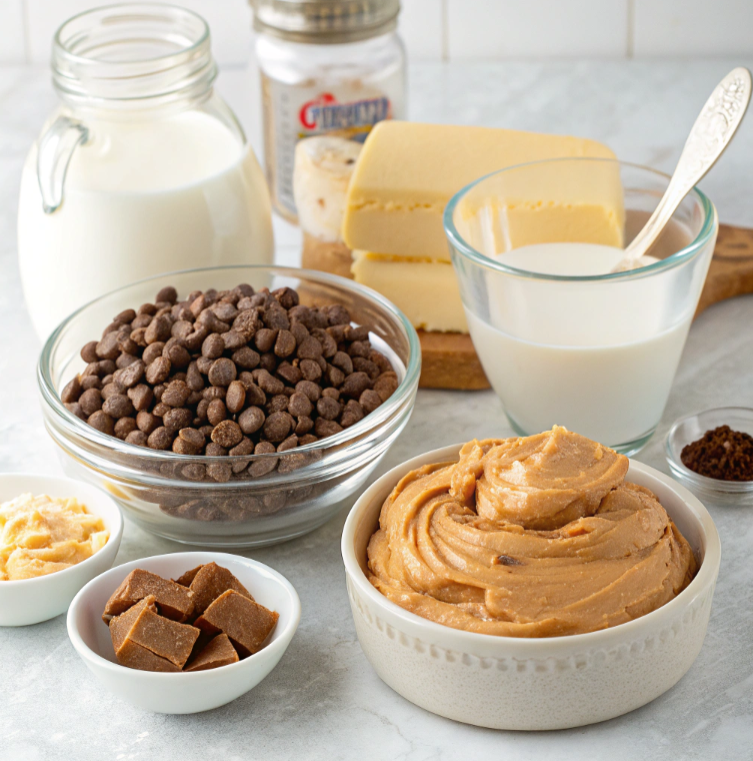
Creating the perfect treat begins with gathering the right ingredients. Each component plays a crucial role in achieving the dessert’s signature flavor and texture.

- Peanut Butter or Nut Butter: The key ingredient, it provides the rich, nutty base.
- Sugar: Granulated or powdered sugar adds sweetness and helps achieve the fudge’s firm consistency.
- Butter: Unsalted butter enhances the flavor and ensures a creamy texture.
- Milk: Acts as a binder, combining the ingredients smoothly.
- Vanilla Extract: A touch of vanilla deepens the overall flavor profile.
Optional ingredients for customization:
- Chocolate Chips: For a chocolate twist.
- Chopped Nuts: Add texture and additional flavor.
- Sea Salt: A sprinkle on top balances the sweetness and adds a gourmet touch.
By using fresh, high-quality ingredients, you can elevate the flavor of your fudge to new heights.
Step-by-Step Guide to Making Peanut Butter Fudge at Home
Making this creamy dessert is a straightforward process. Follow these steps to create a batch of this delightful treat:
- Prepare Your Workspace: Line a baking dish with parchment paper for easy removal later.
- Melt the Butter: In a saucepan, melt butter over low heat until fully liquefied.
- Combine Sugar and Milk: Gradually add sugar and milk, stirring continuously. Bring the mixture to a gentle boil.
- Add Peanut Butter: Remove from heat and quickly stir in the nut butter until fully incorporated.
- Mix in Vanilla Extract: Add a splash of vanilla extract for added depth of flavor.
- Pour Into the Dish: Transfer the mixture to the prepared baking dish, spreading it evenly.
- Cool and Set: Allow the fudge to cool at room temperature or refrigerate it until firm.
- Cut and Serve: Once set, cut the fudge into squares and enjoy.
This method ensures consistent results, yielding smooth and creamy fudge every time.
Tips for Perfect Fudge Texture
Achieving the ideal texture for your dessert requires attention to detail. Here are some tips to help:
- Stir Continuously: Prevent sugar crystallization by maintaining a steady stirring motion.
- Monitor Temperature: Avoid overheating, which can lead to a gritty texture.
- Use Fresh Ingredients: Fresh butter and peanut butter ensure a smoother consistency.
- Allow Proper Cooling: Let the fudge cool completely before cutting to maintain its structure.
- Store Correctly: Keep the fudge in an airtight container to retain its moisture and flavor.
By following these guidelines, you can create a batch of fudge with the perfect balance of firmness and creaminess.
Common Variations to Try
One of the reasons this dessert is so popular is its adaptability. Here are some common variations to try:
- Chocolate Swirl: Swirl melted chocolate into the mixture for a marbled effect.
- Crunchy Nut Fudge: Use crunchy peanut butter for added texture.
- Salted Caramel: Drizzle caramel sauce and sprinkle sea salt on top for a gourmet touch.
- Holiday-Themed Fudge: Add festive sprinkles or food coloring to match the season.
- Nutty Delight: Incorporate chopped pecans, almonds, or walnuts for extra flavor and crunch.
These variations allow you to customize the dessert to suit different tastes and occasions, ensuring there’s a version for everyone to enjoy.
Vegan and Gluten-Free Fudge Options
Creating a version of this treat that’s both vegan and gluten-free is simple with a few substitutions. Instead of dairy butter, use plant-based butter or coconut oil for the same creamy texture. Replace regular milk with almond milk, soy milk, or any other plant-based alternative. Make sure your ingredients are free of gluten and animal-derived components. These adjustments ensure that everyone can enjoy this delectable treat regardless of dietary restrictions.
Creative Add-Ins for Unique Fudge
For a unique twist on the classic recipe, consider adding creative ingredients. Popular choices include crushed pretzels for a salty crunch, dried fruits like cranberries or raisins for a touch of sweetness, or shredded coconut for added texture. You can also layer your fudge with flavors such as chocolate ganache or caramel to make it even more indulgent. These add-ins allow you to tailor your fudge to suit your personal preferences or a specific theme.
Serving Ideas for Fudge Treats
When it comes to serving, presentation matters. Arrange the fudge squares on a decorative platter for a polished look. For parties, consider wrapping individual pieces in wax paper or decorative wrappers to make them easy to grab. You can also pair this dessert with coffee or tea for a delightful afternoon treat. These serving ideas add an extra touch of elegance to your homemade dessert.
Storing and Preserving Freshness
Proper storage is key to maintaining the freshness of your fudge. Keep the dessert in an airtight container at room temperature for up to one week. For longer storage, refrigerate it in a sealed container to preserve its texture and flavor for up to two weeks. If you’d like to keep it even longer, freeze individual pieces and thaw them as needed. These storage tips help ensure your dessert stays delicious for every occasion.
Troubleshooting Common Mistakes
Even with the best intentions, fudge can sometimes go awry. If your dessert turns out too hard, it may have been overcooked. To fix this, try adding a bit of warm milk and re-melting the mixture. If it’s too soft, it may need more time to set or additional sugar to firm it up. By addressing common issues, you can perfect your skills and avoid future mishaps.
Healthier Alternatives for Recipes
For a lighter version of this treat, consider using natural nut butter with no added sugar or oil. Substitute traditional sugar with a natural sweetener like maple syrup or stevia. Use coconut milk instead of regular milk for a dairy-free alternative. These adjustments result in a healthier treat without compromising the creamy texture and nutty flavor that makes fudge so irresistible.
Special Occasions with Homemade Peanut Butter Fudge
This versatile dessert can be tailored to suit any special occasion. For birthdays, decorate it with colorful sprinkles or edible glitter. During the holidays, use cookie cutters to shape the fudge into festive designs. You can even package it in decorative boxes or tins for a thoughtful homemade gift. These ideas make this dessert the perfect choice for celebrating life’s memorable moments.
FAQ about Peanut Butter Fudge
Q: Can I make fudge without a stovetop? A: Yes, you can make microwave versions by melting the ingredients in short intervals, stirring frequently, and then setting it in the fridge.
Q: How long does fudge take to set? A: It typically takes about 1-2 hours to set at room temperature. For faster results, refrigerate for 30-45 minutes.
Q: Can I use natural nut butter? A: Yes, but keep in mind that natural peanut butter’s oil separation may affect the texture. Stir thoroughly before use.
Q: What can I do if my fudge is too soft? A: If the fudge doesn’t set properly, try refrigerating it longer or reheating it with additional sugar to thicken the mixture.
Q: Can I freeze fudge? A: Absolutely! Wrap individual pieces in wax paper or plastic wrap, store in an airtight container, and freeze for up to 3 months.
Conclusion
Despite its simplicity, this fudge delivers a luxurious taste and texture that rivals more complex desserts. Its ability to evoke warm memories and bring people together makes it a treat worth sharing. Whether you’re making it for yourself, your family, or your friends, the joy it brings is undeniable. By experimenting with variations, add-ins, and presentation, you can create a batch that is uniquely yours, ensuring this beloved dessert continues to delight for years to come.
